This Grilled Kielbasa Sandwich is the ultimate comfort food for anyone who loves the smoky, savory snap of a perfectly cooked Polish sausage. Imagine a juicy beef kielbasa, glistening with an oily sheen and marked by deep, smoky char from the grates, nestled inside a toasted bun. This recipe is designed to hit every sensory note, from the translucent, caramelized sweet onions to the vibrant, blistered bell peppers that overflow with every bite.
Whether you are hosting a summer backyard BBQ or looking for a quick, high-impact weeknight dinner, this sandwich delivers a restaurant-quality experience right in your kitchen. The combination of the snappy sausage skin and the soft, porous texture of a golden-brown toasted bun creates a mouth-watering focal point that Pinterest scrollers won’t be able to resist. Let’s dive into how to create this beautifully messy, flavor-packed masterpiece.

Why This Grilled Kielbasa Sandwich Recipe Works
- Extreme Texture Contrast: You get the snap of the grilled sausage, the crunch of the toasted bun, and the silky tenderness of caramelized onions.
- Blistered Perfection: High-heat searing ensures the bell peppers are tender yet charred, providing that classic “street fair” flavor profile.
- Customizable Sauce Drips: Whether you prefer a spicy mustard or a rich aioli, the messy styling of this sandwich makes it visually irresistible and incredibly savory.
- Quick & Efficient: This recipe transitions from the prep board to the plate in under 30 minutes, making it a staple for busy families.
Essential Ingredients for the Perfect Kielbasa Hero
To achieve the level of “material realism” seen in professional food photography, we need high-quality ingredients that react beautifully to heat. Here is what you will need for your Grilled Kielbasa Sandwich.
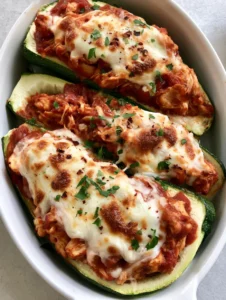
Beef Kielbasa: 1 lb (450g). Look for a high-quality, pre-smoked beef kielbasa. Beef provides a richer, more “glossy” oily sheen when grilled compared to turkey varieties. You can also try this with other sausages if you’re a fan of our Greek Chicken Gyros.
Sweet Onions: 2 large (approx. 500g). We use sweet onions because their high sugar content allows them to become translucent and caramelized much faster than red onions.
Bell Peppers: 2 medium (300g). Use a mix of red and yellow for visual pop. We will be cooking these over high heat to achieve those signature “blistered” skins.
Hoagie or Brioche Buns: 4 buns. You want a bun with a porous texture that can soak up the sausage juices and sauce drips. A golden-brown toast is non-negotiable here.
Olive Oil or Butter: 2 tbsp (30ml). This is the “invisible” foundation for searing your vegetables and achieving that toasted texture on the bread.
Kosher Salt & Black Pepper: To taste. Essential for drawing moisture out of the onions to speed up caramelization.
Optional Sauce: A mixture of Dijon mustard and mayo creates those organic, irregular drips that make the sandwich look “perfectly messy.” If you want a more buttery finish, a dollop of Cowboy Butter on the hot sausage is a game-changer.
The Secret to Perfectly Caramelized Onions and Blistered Peppers
The hallmark of a professional-grade Grilled Kielbasa Sandwich lies in the vegetables. Most home cooks undercook their onions, leaving them crunchy and pungent. To get that translucent, jammy texture, you must start the onions first.
Slicing the onions thinly is key. Use a heavy-bottomed skillet or a flat-top grill surface. By the time your sausage has those beautiful char marks, your onions should be sweet, golden, and overflowing from the sides of the bun.
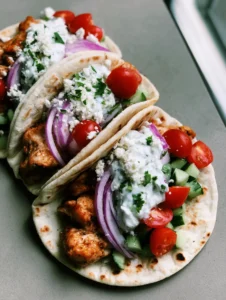
For the peppers, don’t be afraid of the flame. We want the skins to slightly “blister” and blacken in spots. This adds a smoky depth that complements the grilled meat perfectly. If you enjoy this flavor profile, you’ll also love the charred elements in our Chicken Street Tacos.

Step-by-Step Instructions for the Ultimate Grill Experience
Step 1: Prep the Aromatics and Vegetables
Thinly slice your sweet onions into half-moons. Slice the bell peppers into long, thin strips. This shape ensures they stay tucked inside the bun while still overflowing enough for that “messy styling” look.
Step 2: Sauté for Translucence and Caramelization
Heat 1 tbsp (15ml) of oil in a large skillet over medium-high heat. Add the onions and a pinch of salt. Cook, stirring occasionally, for about 10-12 minutes until they are translucent and starting to turn a rich golden brown. Add the peppers during the last 6 minutes, allowing them to blister and soften.
Step 3: Scoring and Grilling the Kielbasa
While the vegetables cook, prep your beef kielbasa. Slice the link into 6-inch (15cm) segments. Cut each segment in half lengthwise (butterflying). This increases the surface area for the grill, ensuring you get those juicy, visible char marks and an oily, glossy sheen.
Place the kielbasa cut-side down on a hot grill (or grill pan). Grill for 3-4 minutes per side until the skin is snappy and the edges are slightly blackened. If you love the technique of searing meat for maximum flavor, check out our Oklahoma Onion Smash Burger.
Step 4: The Golden-Brown Bun Toast
Split your buns and lightly coat the inside with butter or oil. Place them face-down on the grill for 60-90 seconds. You are looking for a porous, toasted texture with scattered natural bread crumbs visible. This prevents the bread from becoming soggy once we add the sauce.
Step 5: Masterful Assembly and Sauce Drips
Spread a generous layer of your favorite sauce on the bottom bun. Layer on a hefty portion of the translucent onions and blistered peppers. Nestled the grilled kielbasa on top. Finish with another irregular drizzle of sauce to create those mouth-watering drips.
Expert Tips for Success
- Temperature Control: Ensure your grill is at least 400°F (200°C) before adding the sausage to get immediate char marks without overcooking the center.
- The “Gloss” Factor: If your sausage looks dry, a tiny brush of melted butter right before serving will recreate that high-realism oily sheen seen in food photography.
- Bun Choice Matters: Avoid standard “hot dog” buns. Use a sturdy hoagie or sub roll that can support the weight of the overflowing ingredients.
- Steam the Cheese: If you want to add cheese, place a slice on the kielbasa during the last minute of grilling and cover with a lid to get a beautiful melt. For a bolder flavor, you could even use a spread from our Cowboy Cream Cheese recipe.
Storage, Reheating, and Freezing
Storage: Store the grilled kielbasa and the pepper/onion mixture in separate airtight containers in the refrigerator for up to 4 days. Do not store the assembled sandwich, as the bread will lose its toasted texture.
Reheating: For the best results, reheat the kielbasa and vegetables in a skillet over medium heat. This helps maintain the “snap” of the sausage skin. Avoid microwaving if possible, as it can make the sausage rubbery.
Freezing: The grilled sausage and sautéed vegetables freeze well for up to 2 months. Thaw overnight in the fridge before reheating.
What to Serve With This Grilled Kielbasa Sandwich
Since this sandwich is heavy and savory, it pairs beautifully with bright, acidic sides. A crisp vinegar-based slaw or a cold pasta salad works wonders. We highly recommend serving this alongside our Deviled Egg Macaroni Salad for a classic picnic feel.
If you’re looking for something lighter, a Marinated Cauliflower Salad provides a nice crunch that cuts through the richness of the beef sausage.
Frequently Asked Questions
Yes, but turkey kielbasa has less fat, so it won’t achieve the same glossy sheen or rich flavor. If using turkey, brush it with a little olive oil before grilling.
Cook them over high heat with a small amount of oil. Let them sit undisturbed for 1-2 minutes at a time so the skin can blacken and char before stirring.
Toasting the bun is crucial. A well-toasted, porous interior creates a barrier that prevents the sauce and sausage juices from soaking through the bread immediately.
Since most kielbasa is sold pre-cooked and smoked, boiling is unnecessary. Grilling directly provides a better oily sheen and snappier skin texture.
A sturdy hoagie, sub roll, or brioche bun is best. You need a bread with a porous texture that can be toasted to a golden brown to support the weight and juices of the sausage and onions.
The Best Grilled Kielbasa Sandwich Recipe
Grilled Kielbasa Sandwich with Blistered Peppers and Onions
Ingredients
Equipment
Method
- Heat oil in a skillet over medium-high heat. Add onions and salt; cook for 10-12 minutes until translucent and golden.
- Add peppers to the skillet during the last 6 minutes of cooking until softened and blistered.
- Grill butterflied kielbasa segments for 3-4 minutes per side until charred and glossy.
- Toast buns on the grill for 60-90 seconds until golden brown with a porous texture.
- Layer sauce, onions, peppers, and the grilled sausage into the bun. Garnish with extra sauce drips.
Notes
Use sweet onions (like Vidalia) for the best caramelization results.

Save This Recipe to Pinterest!
Don’t lose this recipe! If you enjoyed this Grilled Kielbasa Sandwich, make sure to save it to your “Easy Dinners” or “Grilling Recipes” board on Pinterest. Follow Noudish_Recipes for more high-impact, delicious content! If you make this, snap a photo and share your results in the comments below—I love seeing your “perfectly messy” creations. Don’t forget to leave a 5-star rating!