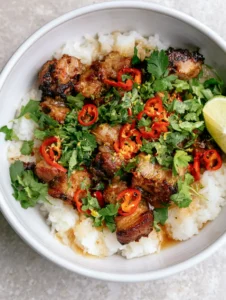
There’s something uniquely satisfying about a rustic, hearty bowl of Golden Chicken Curry. This isn’t just a meal; it’s a masterpiece of culinary comfort. Imagine tender chunks of chicken enveloped in a rich, glistening yellow curry sauce, so vibrant it practically glows. This recipe is designed to bring that exact mouth-watering, home-cooked vision to your kitchen table, complete with the aromatic promise of authentic spices and a final garnish of fresh, verdant cilantro.
From the moment the aromatics hit the pan to the final, satisfying spoonful, you’ll be creating a dish that’s as beautiful as it is delicious. The natural kitchen light will dance off the textures, just as described in our visual blueprint, promising a truly spectacular meal. Get ready to create the most appetizing curry you’ve ever made from scratch.

Why This Golden Chicken Curry Will Become a Staple
This recipe is more than just a list of instructions; it’s a guaranteed path to a perfect meal. Here’s what makes it so special:
- Visually Stunning: The vibrant, golden hue from turmeric creates a dish that’s a feast for the eyes before it even reaches your lips.
- Incredibly Rich & Creamy: We use full-fat coconut milk to build a sauce with a luxurious, glistening texture that perfectly coats every piece of chicken.
- Tender & Juicy Chicken: By searing boneless, skinless chicken thighs first, we lock in moisture and flavor, guaranteeing perfectly tender chunks in every bite.
- Authentic, Layered Flavor: A carefully selected blend of spices creates a deep, aromatic, and balanced curry that tastes like it simmered for hours, but comes together in under an hour.
The Golden Pantry: Key Components for a Radiant Curry
Achieving that signature golden glow and rich flavor comes down to using the right ingredients. Each component plays a critical role in the final masterpiece.
The Core Ingredients
- Boneless, Skinless Chicken Thighs: We use 1.5 lbs (680g) of chicken thighs, cut into 1-inch chunks. Thigh meat is more forgiving and results in the tender, succulent texture you see in the dish.
- Full-Fat Coconut Milk: Two 13.5-oz (400ml) cans are the secret to the curry’s rich, creamy, and glistening sauce. Do not substitute with low-fat versions, as it will compromise the texture.
- Fresh Cilantro: A small bunch, roughly chopped, is used for the essential final garnish. Its fresh, bright flavor cuts through the richness of the sauce perfectly.
The Aromatic Foundation & Spices
- Avocado Oil (or other neutral oil): You’ll need 2 tbsp (30ml) for searing. Its high smoke point makes it ideal for getting a good crust on the chicken.
- Yellow Onion: One medium onion, finely diced, creates the sweet, savory base of our sauce.
- Fresh Garlic & Ginger: 4 cloves of minced garlic and 1 tbsp (15g) of freshly grated ginger are non-negotiable for an authentic, aromatic curry.
- Turmeric: This is the star. 2 tsp (10g) of ground turmeric provides the signature vibrant, golden-yellow color.
- Cumin & Coriander: 1 tsp (5g) of each, ground, adds earthy warmth and depth to the spice profile.
- Garam Masala: 1 tsp (5g) added at the end brightens the flavor and adds a final layer of complex aroma.
- Cayenne Pepper: A pinch, about ¼ tsp (1.25g), adds a subtle warmth without making the dish overtly spicy. Adjust to your preference.
- Chicken Broth: ½ cup (120ml) helps to adjust the sauce’s consistency as it simmers.
- Lime Juice: The juice of half a lime, squeezed in at the end, balances the richness and makes all the flavors pop.
- Salt & Black Pepper: Essential for seasoning. We’ll use about 1 tsp (5g) of salt and ½ tsp (2.5g) of black pepper, adjusted to taste.
Essential Tools For Curry Mastery
You don’t need a professional kitchen to make this dish. Here are the essential tools to ensure a perfect result:
- Large Dutch Oven or Heavy-Bottomed Pot: This is crucial for even heat distribution when searing the chicken and simmering the sauce.
- Sharp Chef’s Knife: For efficiently preparing your onion, garlic, ginger, and chicken.
- Measuring Spoons & Cups: Accuracy in your spice measurements is key to a balanced curry.
- Wooden Spoon or Spatula: For stirring the sauce and scraping up the flavorful browned bits from the bottom of the pot.

Crafting the Perfect Golden Chicken Curry, Step-by-Step
Follow these phases closely, paying attention to the sensory cues. The process is just as rewarding as the final dish.
Phase 1: Searing the Chicken for Maximum Flavor
First, pat your chicken chunks completely dry with paper towels and season generously with salt and pepper. Heat the avocado oil in your Dutch oven over medium-high heat. You’ll know it’s ready when the oil shimmers slightly.
Working in batches to avoid overcrowding the pan, sear the chicken for 2-3 minutes per side. You’re looking for a deep golden-brown crust to form. This isn’t about cooking it through, but developing flavor. Remove the seared chicken and set it aside.
Phase 2: Building the Rich, Aromatic Base
Reduce the heat to medium and add the diced onion to the pot. Sauté for 5-7 minutes, stirring occasionally, until it becomes soft and translucent. You should smell a sweet, savory aroma filling your kitchen.
Next, add the minced garlic and grated ginger, stirring constantly for about 60 seconds until they become fragrant. Immediately add the ground turmeric, cumin, coriander, and cayenne pepper. Toast the spices for another 30-45 seconds, stirring constantly to prevent burning. This step is critical; it blooms the spices and deepens their flavor.
Phase 3: Simmering to Glistening Perfection
Pour in the chicken broth to deglaze the pot, scraping up any browned bits from the bottom. Whisk in the two cans of full-fat coconut milk until the sauce is smooth. Bring the mixture to a gentle simmer.
Return the seared chicken and any accumulated juices back into the pot. Reduce the heat to low, cover, and let it simmer for 15-20 minutes. The sauce will thicken, and the chicken will become incredibly tender. The curry should be glistening, and the color a deep, rich gold.
Phase 4: The Finishing Touches
Stir in the garam masala and the fresh lime juice. Taste the sauce and adjust seasoning with more salt if needed. Serve the Golden Chicken Curry hot in rustic bowls, garnished generously with the chopped fresh cilantro.
Secrets to a Flawlessly Glistening & Flavorful Curry
- Don’t Use Low-Fat Coconut Milk: Full-fat is essential for creating that rich, creamy, glistening sauce. Low-fat versions will result in a thin, lackluster curry.
- Bloom Your Spices: Briefly toasting the dry spices in the pot before adding liquids awakens their essential oils and unlocks a deeper, more complex flavor profile.
- Don’t Overcrowd the Pan: Searing the chicken in batches is key to developing a proper crust. Overcrowding will steam the chicken instead of searing it.
- The Power of Acidity: The final squeeze of lime juice might seem minor, but it’s crucial for balancing the rich, creamy flavors and making the entire dish taste brighter and more vibrant.
Storing, Reheating, and Freezing Your Curry
This Golden Chicken Curry is perfect for leftovers and meal prep.
To Store: Allow the curry to cool completely before transferring it to an airtight container. It will keep in the refrigerator for up to 4 days.
To Reheat: Gently reheat the curry in a saucepan over medium-low heat until warmed through. You can add a splash of water or chicken broth if the sauce has thickened too much.
To Freeze: This curry freezes beautifully. Place it in a freezer-safe, airtight container and freeze for up to 3 months. Thaw it overnight in the refrigerator before reheating.
Perfect Pairings: What to Serve with Your Curry
A great curry deserves the perfect companions to complete the meal. Basmati or jasmine rice is a classic choice to soak up the delicious sauce. For a fantastic homemade bread option, consider pairing it with our [[sourdough-discard-naan|easy sourdough naan recipe]].
If you’re looking for a lighter side, a simple green salad or some steamed vegetables works wonders. For those who enjoy a variety of dishes, serving this curry alongside a different main like our [[baked-stuffed-salmon|delicious stuffed salmon]] can create a memorable feast. And if you’re in the mood for soup, why not start with a cup of our comforting [[lasagna-soup-recipe|Italian lasagna soup]] before the main event?
Golden Chicken Curry: Your Questions Answered
Yes, you can use chicken breast. However, be careful not to overcook it. Reduce the final simmering time to 10-12 minutes to ensure the chicken breast remains tender and juicy.
The best way to thicken the sauce is to let it simmer gently with the lid off for the last 5-10 minutes of cooking. This allows excess water to evaporate and concentrates the flavor. Using full-fat coconut milk also ensures a naturally thick and creamy sauce.
This recipe is mild, with just a subtle warmth from the pinch of cayenne pepper. You can easily increase the heat by adding more cayenne or a chopped chili with the aromatics, or omit it completely for a non-spicy version.
The signature vibrant yellow color comes from ground turmeric, a key spice in the recipe that provides both color and earthy flavor.
Store leftover Golden Chicken Curry in an airtight container in the refrigerator for up to 4 days. The flavors often meld and become even better the next day.
Your Printable Golden Chicken Curry Recipe
Here is the complete recipe, ready for you to print and bring into your kitchen. Enjoy creating this mouth-watering, home-cooked masterpiece!
Golden Chicken Curry: An Authentic & Easy Recipe
Ingredients
Equipment
Method
- Pat chicken chunks dry and season with salt and pepper. Heat avocado oil in a Dutch oven over medium-high heat. Working in batches, sear the chicken for 2-3 minutes per side until a golden-brown crust forms. Remove chicken and set aside.
- Reduce heat to medium, add diced onion and sauté for 5-7 minutes until soft. Add minced garlic and grated ginger, stirring for 1 minute until fragrant. Add turmeric, cumin, coriander, and cayenne pepper, and toast for 45 seconds while stirring.
- Pour in chicken broth to deglaze the pot. Whisk in the coconut milk until smooth and bring to a gentle simmer. Return the seared chicken to the pot, reduce heat to low, cover, and simmer for 15-20 minutes until the chicken is tender and the sauce has thickened.
- Stir in the garam masala and fresh lime juice. Taste and adjust seasoning if needed. Serve hot, garnished with fresh cilantro.
Notes
Bloom your spices by toasting them to unlock deeper flavor.
Sear the chicken in batches to ensure a proper golden-brown crust.
Don't skip the final squeeze of lime juice; it balances and brightens the entire dish.

Share Your Masterpiece!
We can’t wait to see your version of this Golden Chicken Curry! If you make this recipe, be sure to leave a comment below and let us know how it turned out. Don’t forget to save it to your favorite board on Pinterest and share it with your friends and family!