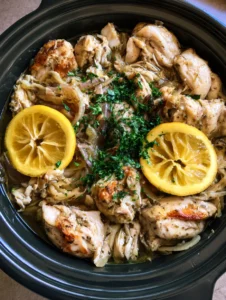
If you are looking for the ultimate crowd-pleasing appetizer or a quick weeknight dinner, these Cheeseburger Bombs are the answer to your cravings. Imagine a golden-brown, flaky biscuit stuffed with juicy, seared ground beef and a massive pocket of gooey, melted yellow cheddar cheese. Every bite of these Cheeseburger Bombs delivers that classic burger flavor wrapped in a handheld, garlic-buttered package that is simply irresistible to Pinterest foodies and home cooks alike.
The magic happens when you tear one of these Cheeseburger Bombs open. You are immediately met with the sight of thick, melted yellow cheddar cheese stretching from a core of perfectly seasoned beef crumbles. This recipe is designed to be high-impact with minimal effort, making it a viral-ready dish that looks just as good as it tastes. Whether you are hosting a game day party or just need a fun family meal, these Cheeseburger Bombs will disappear from the serving board in seconds.

Why These Garlic Parmesan Cheeseburger Bombs Are a Total Game Changer
- Explosive Flavor Profile: The combination of savory beef, sharp cheddar, and a punchy garlic parmesan glaze creates a restaurant-quality experience at home.
- Textural Perfection: You get a soft, airy interior from the biscuit dough contrasted with a slightly crispy, golden-brown crust.
- Ultimate Portability: These are the perfect handheld snacks for parties, allowing guests to mingle while enjoying a full “burger” experience.
- Customizable Fillings: While we focus on the classic cheeseburger, you can easily adapt this base for endless variations.
When we talk about Cheeseburger Bombs, we are talking about comfort food evolved. This isn’t just a snack; it’s a culinary “bomb” that explodes with butter, garlic, and beefy goodness. The key is in the finishing touch—a heavy brushing of melted garlic butter and a dusting of finely grated parmesan cheese that creates a savory crust that mimics the best garlic knots you’ve ever had.
The Essential Ingredients for Perfect Cheeseburger Bombs
To achieve that Pinterest-perfect look and professional flavor, every ingredient serves a specific culinary purpose. Here is what you will need for your Cheeseburger Bombs:
- Ground Beef: Use an 80/20 blend for 1 lb (450g) of meat. This ensures the beef stays juicy and flavorful inside the dough.
- Refrigerated Biscuit Dough: 1 can (approx. 16 oz / 450g) of flaky layers biscuit dough provides the perfect buttery, soft vessel.
- Yellow Cheddar Cheese: 4 oz (115g) of thick-cut cubes or shredded cheddar. We want that iconic yellow melt that looks stunning in photos.
- Unsalted Butter: 4 tbsp (56g) of melted butter serves as the base for our signature glaze.
- Minced Garlic: 2-3 cloves of fresh garlic, finely minced, provide the aromatic punch that defines the exterior.
- Dried Parsley Flakes: 1 tsp for a pop of green color and a subtle earthy finish.
- Finely Grated Parmesan Cheese: 2 tbsp (15g) of parmesan creates a salty, umami-rich crust on the top of the Cheeseburger Bombs.
- Salt and Pepper: Crucial for seasoning the beef crumbles to bring out the natural flavors.
If you love the savory, buttery profile of this recipe, you absolutely have to check out our cowboy butter recipe which pairs perfectly as a dipping sauce for these bombs. The bold spices and citrus in the butter elevate the seared beef to a whole new level.
How to Make Cheeseburger Bombs: Step-by-Step Instructions
Step 1: Searing the Beef for Maximum Flavor
In a large skillet over medium-high heat, add your 1 lb (450g) of ground beef. Use a wooden spoon to break the meat into small, seared crumbles. Season generously with salt and pepper. The goal is to get a nice brown crust on the beef—this “Maillard reaction” is where the deep burger flavor comes from. Once fully cooked, drain any excess grease and let the beef cool slightly. If you enjoy a more complex beef flavor, consider using techniques found in our oklahoma onion smash burger for your next cookout.
Step 2: Preparing the Biscuit Dough
Preheat your oven to 375°F (190°C). Open the can of refrigerated biscuits and separate each one. Using your fingers or a small rolling pin, flatten each biscuit into a circle about 4-5 inches (10-12cm) in diameter. Ensure the edges are slightly thinner than the center, as this will help in sealing the Cheeseburger Bombs without creating a thick “dough knot” at the bottom.

Step 3: Stuffing the Bombs
Place a generous tablespoon of the seared beef crumbles in the center of each flattened dough circle. Top the beef with a thick cube or a pile of shredded yellow cheddar cheese. Be careful not to overfill, as you need enough room to seal the dough completely. The visual of the Cheeseburger Bombs relies on a tight seal to keep that liquid gold cheese inside.
Step 4: Sealing and Shaping
Gently pull the edges of the dough up and over the filling, pinching them together tightly to form a smooth ball. Place each bomb seam-side down on a parchment-lined baking sheet or a dark wooden serving board if using a cast-iron skillet for baking. Space them about 2 inches (5cm) apart to allow for expansion as the Cheeseburger Bombs bake to a golden brown.
Step 5: The Garlic Parmesan Glaze
In a small bowl, whisk together the 4 tbsp (56g) of melted butter, minced garlic, and dried parsley flakes. Using a pastry brush, generously coat the top and sides of each dough ball. This glaze is what creates the “glistening” effect seen in viral Pinterest photos. Finally, sprinkle the tops with the finely grated parmesan cheese.
Step 6: Baking to Golden Perfection
Slide the tray into the oven and bake for 12-15 minutes. You are looking for a deep golden-brown exterior. The Cheeseburger Bombs should look puffy and the parmesan should be slightly toasted. The smell of garlic and baking bread will fill your kitchen—this is the sensory cue that they are ready.
Expert Tips for Success
- Keep it Cold: Work with the biscuit dough while it is straight from the fridge. Cold dough is much easier to handle and seal than room-temperature dough.
- Drain the Beef: Ensure the beef is very well-drained. Any excess fat will make the dough soggy and prevent a proper seal, leading to “cheese leaks.”
- Cheese Selection: For the best “cheese pull,” use a high-quality block of cheddar and cut it into cubes rather than using pre-shredded cheese, which often contains anti-clumping agents that hinder melting.
- The “Tear-Open” Test: For the best presentation, let the Cheeseburger Bombs rest for 3-5 minutes before serving. This allows the cheese to set slightly so it flows beautifully when torn open.
For a different twist on cheesy appetizers, you might also enjoy our cowboy cream cheese spread, which offers a spicy, creamy contrast to the savory beef in this recipe.
Storage, Reheating & Freezing Instructions
Storage: Store any leftover Cheeseburger Bombs in an airtight container in the refrigerator for up to 3 days. They make excellent leftovers for a quick lunch.
Reheating: To maintain the crispy exterior, reheat in an oven or air fryer at 350°F (175°C) for 5-7 minutes. Microwaving is possible (30-45 seconds) but will result in a softer, less crispy dough.
Freezing: You can freeze these either before or after baking. If freezing before, bake them straight from frozen, adding an extra 5-8 minutes to the cook time. If frozen after baking, let them thaw in the fridge overnight before reheating.
What to Serve With Cheeseburger Bombs
While these are a meal in themselves, pairing them with the right sides can turn them into a feast. We recommend serving them with a side of classic burger toppings: sliced pickles, a drizzle of mustard, or a “special sauce” (mayo, ketchup, relish). If you’re looking for a fresh side, our marinated cauliflower salad provides a bright, acidic crunch that cuts through the richness of the butter and cheese.
Frequently Asked Questions
Yes! Cook them at 350°F (175°C) for 8-10 minutes. Ensure they are spaced apart so the hot air can crisp the entire garlic parmesan crust.
You can assemble the bombs and keep them covered in the fridge for up to 4 hours before baking. Don’t add the garlic butter glaze until right before they go in the oven.
Absolutely. Ground turkey or chicken works well. Just ensure you season it well and perhaps add a dash of Worcestershire sauce to keep the ‘burger’ flavor profile.
Make sure your beef is completely drained of fat and cooled. Pinch the dough seams very tightly and place them seam-side down on the baking sheet.
Refrigerated ‘flaky layers’ biscuit dough is best for texture, but you can also use pizza dough or homemade yeast dough for a chewier result.
The Ultimate Cheeseburger Bombs Recipe Card

Cheeseburger Bombs with Garlic Parmesan Crust
Ingredients
Equipment
Method
- Brown the ground beef in a skillet over medium-high heat. Season with salt and pepper. Drain grease and cool slightly.
- Flatten each biscuit into a 4-5 inch circle.
- Place beef and cheddar in the center. Pinch edges to seal tightly into a ball.
- Brush with garlic butter, sprinkle with parmesan, and bake at 375°F (190°C) for 12-15 minutes until golden brown.
Notes
Ensure beef is drained well to prevent soggy biscuits.

Join the Community!
Did you make these Cheeseburger Bombs? We want to see your results! Save this recipe to your “Dinner Ideas” or “Appetizer” board on Pinterest so you never lose it. Follow Noudish_Recipes for more viral-worthy kitchen inspiration. If you loved the gooey cheese and garlic crust, please leave us a 5-star rating and upload a photo of your golden-brown bombs in the comments below!