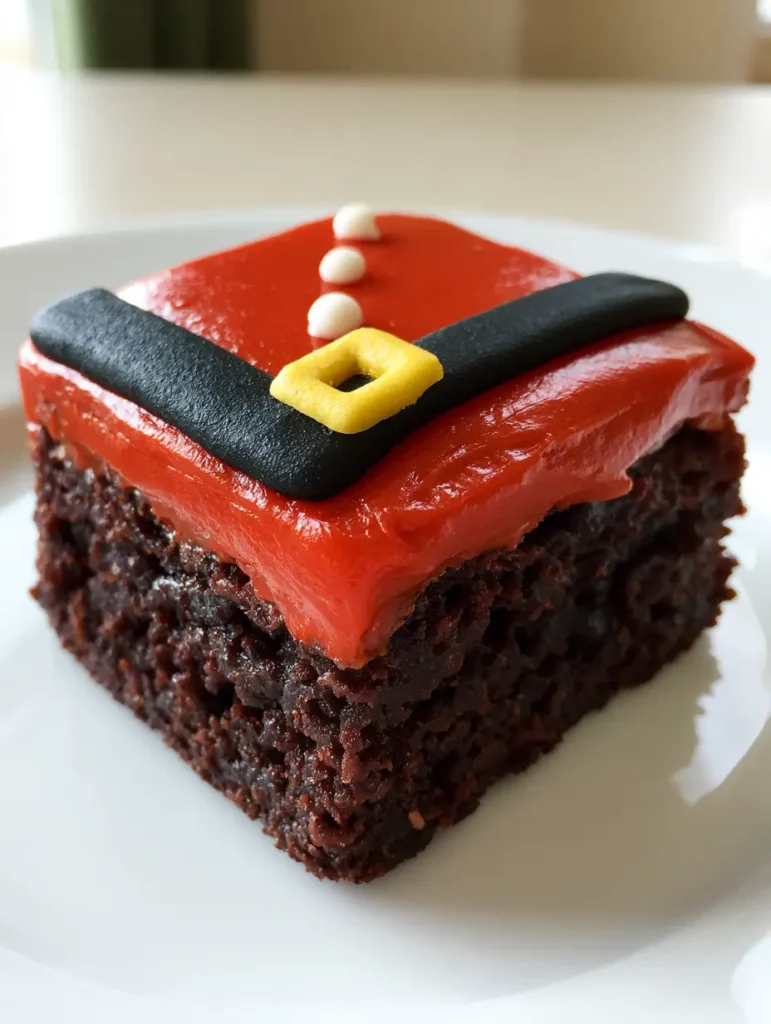
Santa Belly Brownies are the ultimate festive showstopper that combines a rich, decadent chocolate base with a whimsical holiday design. If you are looking for a dessert that captures the magic of Christmas while satisfying even the most intense chocolate cravings, these brownies are your answer. Whether you are hosting a holiday party or looking for a fun kitchen project with the kids, these Santa Belly Brownies deliver a professional look with surprisingly simple techniques.
The beauty of this recipe lies in the contrast between the dense, fudgy dark chocolate brownie and the vibrant, glossy red frosting. By following this guide, you will learn the secrets to achieving that perfect “crackly top” underneath the frosting and how to pipe precise details like the iconic black icing belt and yellow square buckle. This is more than just a recipe; it is a holiday tradition in the making that will have your Pinterest followers hitting “Save” instantly.
Why These Festive Brownies are the Star of the Season
- Ultra-Fudgy Texture: We use a high fat-to-flour ratio to ensure every bite is moist and chocolate-heavy, perfectly matching the Santa Belly Brownies aesthetic.
- Glossy Red Finish: A specialized frosting technique ensures a vibrant, smooth red layer that doesn’t look grainy or dull.
- Simple Decorating: You don’t need a pastry degree to pipe a matte black icing belt or add white frosting buttons.
- Kid-Friendly Fun: This is a fantastic recipe for little hands to help with, especially when placing the yellow square icing buckle.
If you love festive treats as much as we do, you might also want to try our Santa Hat Cheesecake Bites for a full North Pole dessert spread!
The Essential Ingredients for Holiday Brownie Success
To create the perfect Santa Belly Brownies, you need high-quality ingredients that provide both structure and flavor. Here is what you will need to gather:
The Fudgy Brownie Base
Unsalted Butter (1 cup / 227g): Melted butter provides the fat necessary for that signature chewy, fudgy texture. We recommend high-quality grass-fed butter for the richest flavor profile.
Granulated Sugar (2 cups / 400g): Sugar doesn’t just sweeten; it creates the structural integrity of the brownie. When whisked with warm butter, it helps create that coveted shiny top.
Large Eggs (4): These act as the binder. Ensure they are at room temperature so they emulsify perfectly into the chocolate batter.
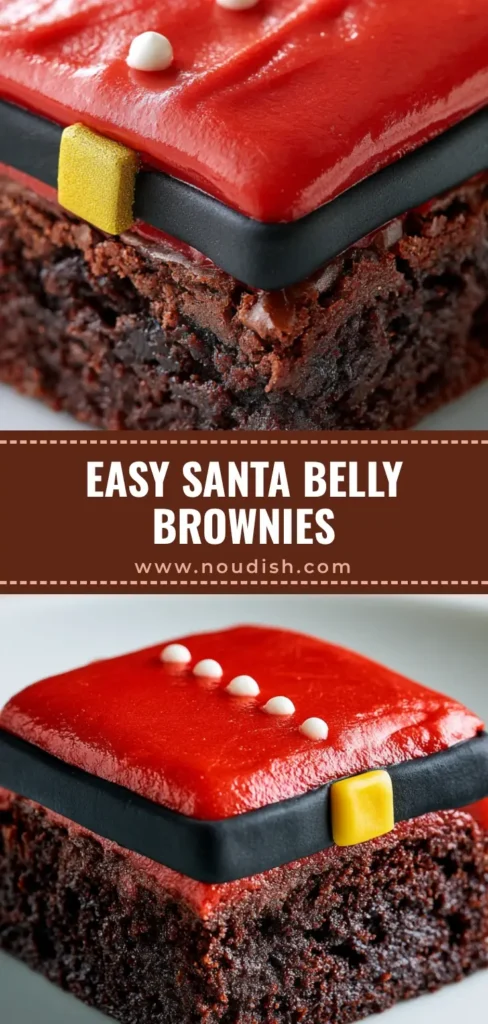
Dutch-Processed Cocoa Powder (3/4 cup / 75g): This is the secret to the dense, fudgy dark chocolate brownie visible in the cross-section. It provides a deeper color and a smoother chocolate taste than natural cocoa.
All-Purpose Flour (1 cup / 125g): We use just enough flour to hold the brownies together. Too much flour leads to “cakey” brownies, which we want to avoid for this specific recipe.
The Santa Belly Decorations
Red Gel Food Coloring: Always use gel rather than liquid to achieve a vibrant, smooth layer of glossy red frosting without thinning out your icing consistency.
Pre-Made Black Icing: For the horizontal strip of matte black icing, using a ready-to-pipe tube ensures the belt looks clean and professional.
Yellow Fondant or Square Sprinkles: This will serve as our yellow square icing buckle. A small gold square sprinkle also works beautifully for a touch of holiday sparkle.
Step-by-Step: Crafting Your Santa Belly Masterpiece
Creating Santa Belly Brownies requires patience, especially during the cooling phase. Follow these steps for professional-grade results every single time.
Preparing the Perfect Dark Chocolate Base
Start by preheating your oven to 350°F (175°C). Line a 9×9 inch (23x23cm) square baking pan with parchment paper, leaving an overhang on the sides. This “sling” makes it incredibly easy to lift the Santa Belly Brownies out for clean slicing later.
Whisk your melted butter and sugar in a large bowl for at least two minutes. Add the eggs one at a time, followed by a teaspoon of vanilla extract. Sift in your cocoa powder and flour, folding gently with a spatula. Stop mixing as soon as the last streak of flour disappears to keep the crumb moist and dense.
Baking for Maximum Fudginess
Pour the batter into the prepared pan and smooth the top. Bake for 25-30 minutes. You are looking for a “visual cue”: the edges should be set, but the center should still have a slight jiggle. A toothpick inserted should come out with a few moist crumbs attached—not clean, and definitely not wet batter. Let the brownies cool completely in the pan before lifting them out. This is vital for the Santa Belly Brownies to hold their square shape.
For more chocolatey inspiration, check out our Banana Bread Brownies for a unique flavor twist!
The Vibrant Red Frosting Application
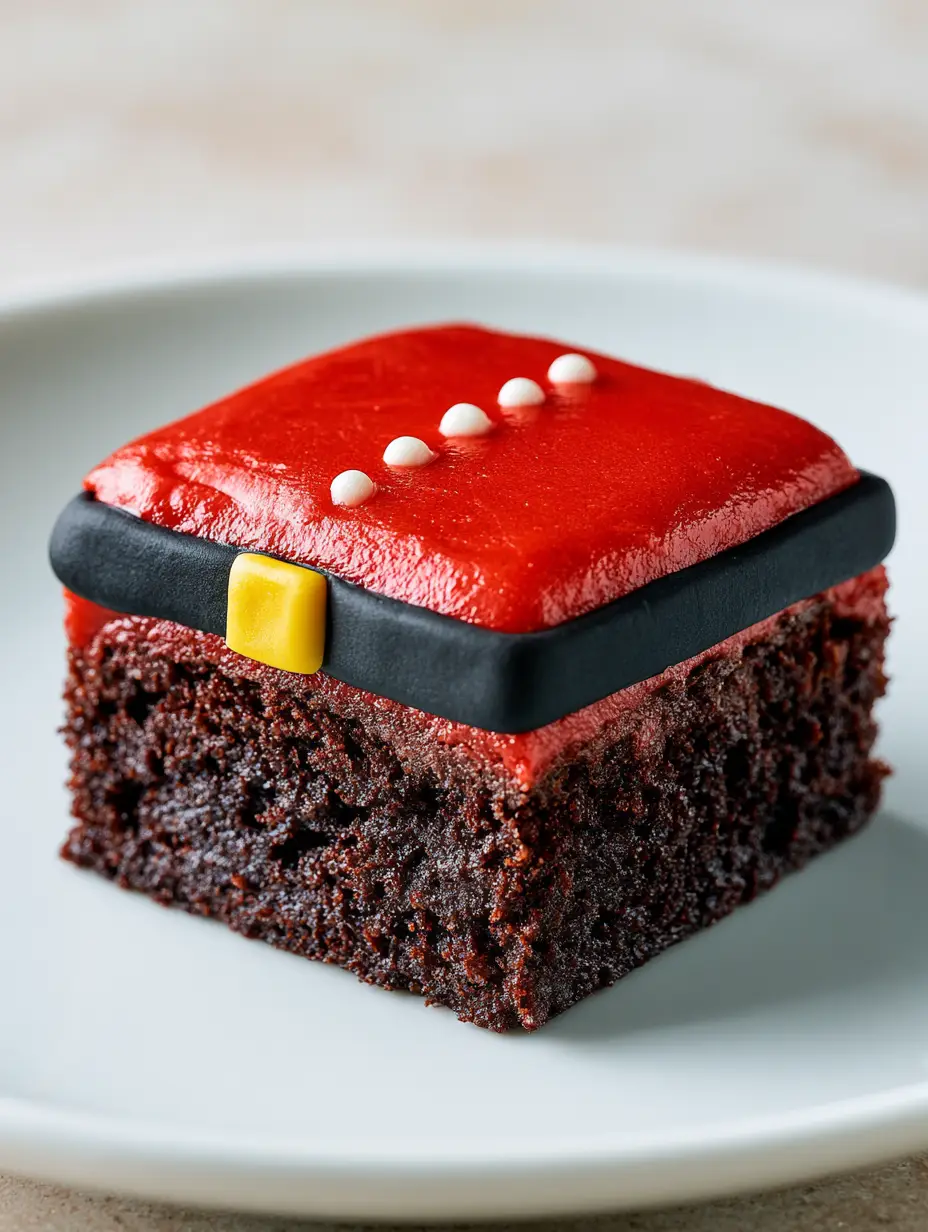
Once cooled, cut the brownies into even squares. To achieve the vibrant, smooth layer of glossy red frosting, we recommend a crusting buttercream or a thick royal icing. Spread the red frosting evenly over each square, right to the edges. For a professional “handheld smartphone photo” look, use an offset spatula to smooth the surface until it catches the light.
Detailing the Santa Suit
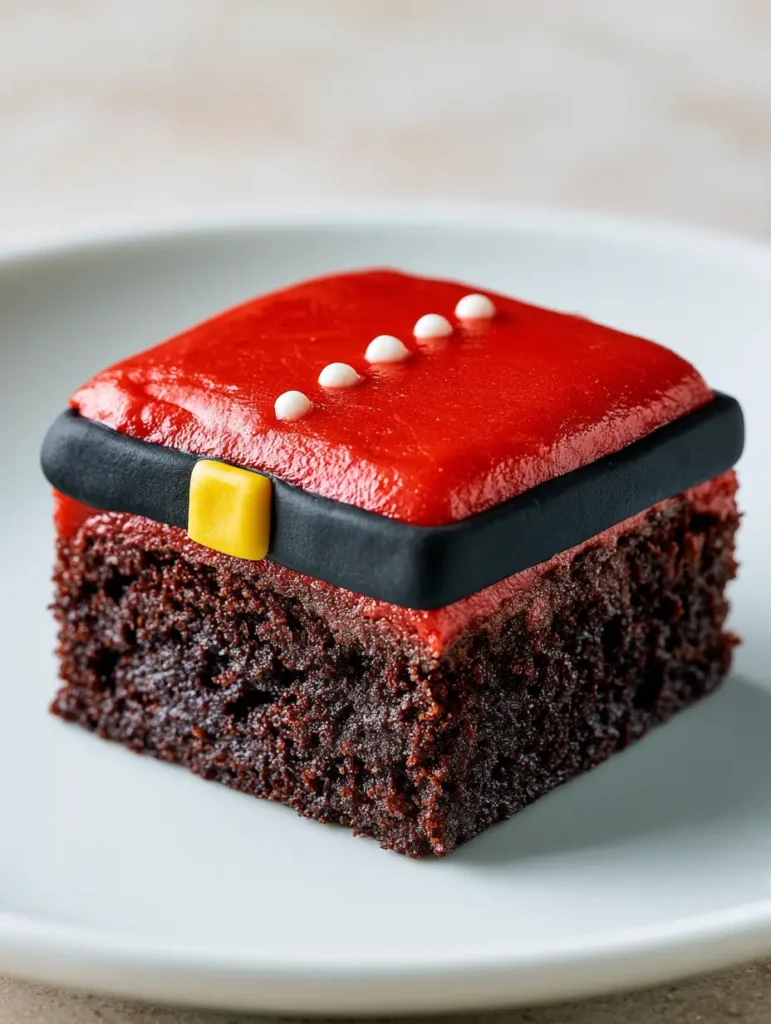
Now comes the fun part! Using a small round piping tip, draw a horizontal strip of matte black icing across the center of the red square. This represents Santa’s belt. In the very center of that black stripe, place your small, bright yellow square of icing or sprinkle to act as the buckle.
Finally, pipe two or three small white frosting dots vertically above the belt. These white frosting buttons complete the iconic look of the Santa Belly Brownies. Allow the icing to set for at least 30 minutes before serving.
Expert Tips for Pinterest-Worthy Results
- The Clean Cut Secret: Chill your brownies in the fridge for 1 hour before cutting. Use a large chef’s knife dipped in hot water (and wiped dry) between every single cut for those perfect, sharp edges seen in our photos.
- Vibrant Red Color: If making your own frosting, let the red icing sit overnight. The color deepens and intensifies as it rests, ensuring your Santa Belly Brownies pop against a white plate.
- Avoid Smeared Belts: Wait for the red frosting to develop a “skin” (about 15 minutes) before piping the black belt. This prevents the colors from bleeding into each other.
- Internal Link Inspiration: If you are planning a full holiday spread, our Cowboy Cream Cheese makes a surprisingly great savory appetizer to balance out the sweetness!
How to Store and Freeze Your Brownies
To keep your Santa Belly Brownies fresh, store them in an airtight container at room temperature for up to 3 days. If you live in a humid environment, the refrigerator is better for preserving the glossy red frosting, but be aware that chocolate brownies can firm up significantly when cold.
Freezing Instructions: You can freeze the undecorated brownie base for up to 3 months. Wrap tightly in plastic wrap and foil. We do not recommend freezing the fully decorated Santa Belly Brownies, as the red food coloring may bleed during the thawing process.
Creative Serving Suggestions
These brownies are designed to be the centerpiece of your dessert table. For a classic look, serve them on a simple white plate as shown in our photos. This neutral background allows the vibrant red frosting to truly shine. If you want to elevate the experience, pair them with a cold glass of milk or a festive peppermint latte.
For a festive party spread, consider serving these alongside our Bavarian Cream topped with fresh raspberries to keep the red-and-white theme going!
Frequently Asked Questions
Yes! You can use a high-quality boxed mix to save time. Just ensure you follow the decorating steps for the red frosting, black belt, and yellow buckle to maintain the Santa Belly look.
The secret is using gel-based food coloring rather than liquid. Gel is highly concentrated, so you get a deep red without changing the consistency of the frosting. For the best color, let the tinted frosting sit for a few hours before using.
Make sure your red frosting has ‘crusted’ or set slightly before piping the black icing on top. If the red frosting is too wet, the colors will eventually blend together.
Chill the brownies in the refrigerator for at least an hour. Use a large, sharp knife dipped in hot water and wiped dry between each cut to get those professional-looking sharp edges.
Cakey brownies usually result from over-mixing the batter or using too much flour. To ensure your Santa Belly Brownies are fudgy, stop mixing as soon as the flour is incorporated and check the oven 5 minutes before the timer ends.
The Ultimate Santa Belly Brownies Recipe
Santa Belly Brownies: The Cutest Fudgy Christmas Treat
Ingredients
Equipment
Method
- Whisk melted butter and sugar for 2 minutes. Add eggs and vanilla, then fold in cocoa, flour, and salt until just combined.
- Pour into a lined 9x9 pan and bake at 350°F (175°C) for 25-30 minutes until edges are set but center remains moist.
- Frost cooled brownie squares with a smooth, glossy layer of red frosting.
- Pipe a horizontal matte black line across the center of each brownie square.
- Place a yellow square buckle in the center of the belt and pipe two small white dots above it for buttons.
Notes
Wait for the red frosting to set slightly before adding the black belt to prevent bleeding.
Join the Noudish Recipes Community!
We hope you love making these Santa Belly Brownies as much as we loved designing them! If you make this recipe, please save it to your Christmas Desserts board on Pinterest so you can find it every year. We would love to see your creations—share a photo in the comments below or tag us on social media! Don’t forget to leave a 5-star rating in the recipe card if these brownies made your holiday a little brighter.
Hungry for more? Explore our Creamy Garlic Butter Tortellini for a quick weeknight dinner before you dive into dessert!